Saturday, 29 May 2010

Backup and Restore a Subversion Repository

Sometimes, you just have to do serious maintenance to a server, like install a new instance of your operating system from scratch with a new partition layout. If this server happens to be your Subversion server, you need to backup your repository and restore it once you're done with the maintenance. Or maybe you just want to move your repository from one server to another. Here's how to do it. The commands below need to be performed on the SVN server by a user who has write access to the repository (in theory any SVN admnistrator).

First, here's how back up the repository to a compressed file:

$ svnadmin dump /path/to/repo | gzip > backup.gz

And how to restore it:

$ gunzip -c backup.gz | svnadmin load /path/to/repo

Those commands are meant for UNIX or Linux so you will have to adapt them if you are running Windows. It shouldn't be too difficult to do so, especially if you are using Cygwin.

Thursday, 29 April 2010

Shared Folders in Ubuntu with setgid and ACL

Introduction

There is an often requested feature on Linux (or UNIX) to have the ability to create shared directories similar to what is possible in Windows, that is a directory in which every person who has been given access can read, write or modify files. However, because Linux file systems such as ext4 enforce file permissions that are stricter than any of the windows file systems such as FAT or NTFS, creating such a directory is not obvious. Of course, if you put your shared directory on a FAT or NTFS partition, it will automatically behave just like in Windows but that requires a separate partition and doesn't allow you to enforce permissions on a per-group basis. So here's a quick guide on how to do this with Ubuntu. The same principles apply to other Linux distributions so should be portable.

Use Cases

Let's go through a couple of classic use cases first, to identify exactly what we want to do.

Project Folder

In a company or university setting where users are assigned to project teams or departments, it can be useful to create shared folders where all members of the team can drop files that are useful for the whole team. They need to be able to create, update, delete files, all in the same folder. They also need to be able to read, update or delete files created by other members of the team. However, users external to the team should only have read access.

Web Development

For anybody doing web development on Linux, a classic problem is when you have to deal with development or test web servers. The default web server process runs with the www-data user and the document directory is owned by the same user. It would be great if all web developers on the team were able to update the document directory on the server while not requiring root access to do so.

Linux Default Behaviour

Linux has the concept of user groups. You can check what groups your user belongs to by typing the following on the command line:

$ groups
bruno adm dialout cdrom plugdev lpadmin admin sambashare

On a default Linux installation, groups are used to give access to specific features to different users, such as the ability to administer the system or use the CD-ROM drive. But one of the core feature of user groups is to support file permissions. Each file has separate sets of read, write and execute permissions for the user who is the owner of the file, the group that owns the file and others, that is everybody else. Whenever a user attempts to read, write or execute a file, the system will decide whether he can do it based on the following rules:

  • if the user is the owner of the file, user permissions apply,
  • otherwise, if the user is part of the group that owns the file, group permissions apply,
  • otherwise, others permissions apply.

So to configure a shared directory as defined above, we need to:

  • create a user group for the team,
  • assign all team member users to that user group,
  • create a directory and configure it so that all users in the group can:
    • add new files to the directory,
    • modify any existing file in the directory,
  • and of course, all this should work without users having to do anything special.

How To

Enable ACL

The first thing we need to do is to enable ACL support on the partition where we will create the shared directory. ACL extend the basic Linux permission implementation to enable more fine grained control. As this requires the file system to be able to store more permission meta-data against files, it needs to be configured accordingly. We can do this by adding the acl option to the relevant line in /etc/fstab, such as:

UUID=b8c490d0-0547-4e1f-b052-7130bacfd936 /home ext4 defaults,acl 0 2

The partition then needs to be re-mounted. If the partition to re-mount is /, /usr or /home, you will probably need to restart the machine. Otherwise, the following commands should re-mount the partition:

$ sudo umount partition
$ sudo mount partition

where partition is the mount point of the partition as defined in /etc/fstab, such as /var/www.

Create Group

We then need to create the group to which we will give shared access, let's call that group teamgroup:

$ sudo groupadd teamgroup

Try to give the group a meaningful name while keeping it short. If it's meant to be a team group, give it the name of the team, such as marketing. Note the following restrictions on Debian and Ubuntu for group names (taken from the man page):

It is usually recommended to only use groupnames that begin with a lower case letter or an underscore, followed by lower case letters, digits, underscores, or dashes. They can end with a dollar sign. In regular expression terms: [a-z_][a-z0-9_-]*[$]?

On Debian, the only constraints are that groupnames must neither start with a dash (-) nor contain a colon (:) or a whitespace (space: , end of line: \n, tabulation: \t, etc.).

Groupnames may only be up to 32 characters long.

We then need to assign users to that group:

$ sudo usermod -a -G teamgroup teamuser

Where teamuser is the login name of the user to assign to the group. This assignment will take effect next time the user logs in. Make sure that you do not forget the -a option otherwise you will wipe out all existing group assignment for that user, rather than just adding a new one.

Create the Folder

The next step is to create the shared folder. This is easy:

$ cd /path/to/parent
$ mkdir teamfolder

Where /path/to/parent is the path to the parent folder and teamfolder is the name of the folder you want to create. We then assign group ownership of the folder to the group previously created:

$ chgrp teamgroup teamfolder

And give write access to the group on that folder:

$ chmod g+w teamfolder

Let's check what this folder looks like:

$ ls -l
drwxrwxr-x 2 teamuser teamgroup 4096 2010-03-03 14:32 teamfolder

Now, let's try to create a new file in that directory:

$ touch teamfolder/test1
$ ls -l teamfolder
-rw-r--r--  1 teamuser teamuser 5129 2010-03-03 14:34 test1

That looks good and any other user who is part of teamgroup should be able to create files in this directory. However, group members will not be able to update files created by other members of the group for the following reasons:

  • the group that owns the file is the user's primary group, rather than teamgroup,
  • the file's permissions only allow the owner of the file to update it, not the group.
Set the setgid Bit

We'll solve the first problem by setting the setgid bit on the folder. Setting this permission means that all files created in the folder will inherit the group of the folder rather than the primary group of the user who creates the file.

$ chmod g+s teamfolder
$ ls -l
drwxrwsr-x 2 teamuser teamgroup 4096 2010-03-03 14:32 folder

Note the s in the group permissions instead of the x that was there previously. So now let's try to create another test file.

$ touch teamfolder/test2
$ ls -l teamfolder
-rw-r--r--  1 teamuser teamuser  5129 2010-03-03 14:34 test1
-rw-r--r--  1 teamuser teamgroup 5129 2010-03-03 14:35 test2

So now whenever a file is created in the team directory, it inherits the team's group.

Set Default ACL

The second issue is related to umask, the default mask applied when creating files and directories. By default umask is set to the octal value 0022, as demonstrated if you run the following:

$ umask
0022

This is a negative mask that is applied to the octal permission value of every file or directory created by the user. By default, a file is created with permissions rw-rw-rw-, equivalent to 0666 in octal and a directory is created with permissions rwxrwxrwx, equivalent to 0777 in octal. umask is then subtracted from that default to give the effective permission with which files and directories are created. So for a file, 0666-0022 gives 0644, equivalent to rw-r--r-- and for a directory 0777-0022 gives 0755, equivalent to rwxr-xr-x. This default is sensible for most situations but needs to be overriden for a team directory. The way to do this is to assign specific ACL entries to the team directory. The first thing to do is to install the acl package to obtain the necessary command line tools. Well, in fact, the first thing to do would be to enable acl on the relevant partition but we already did that at the very beginning.

$ sudo apt-get install acl

Now that the package is installed, we have access to the setfacl and getfacl commands. The first one sets ACLs, the second one reads them. In this particular case, we need to set default ACLs on the team folder so that those ACLs are applied to files created inside the directory rather than the directory itself. The syntax is a bit complicated: the -d option specifies that we want to impact the default ACLs, while the -m option specifies that we want to modify the ACLs and expects an ACL specification to follow.

$ setfacl -d -m u::rwx,g::rwx,o::r-x teamfolder
$ touch teamfolder/test3
-rw-r--r--  1 teamuser teamuser  5129 2010-03-03 14:34 test1
-rw-r--r--  1 teamuser teamgroup 5129 2010-03-03 14:35 test2
-rw-rw-r--  1 teamuser teamgroup 5129 2010-03-03 14:36 test3

There we go, it all works as expected: new files created in the team folder are created with the team's group and are group writeable. To finish off, let's have a look at how the folder's ACLs are stored:

$ getfacl teamfolder
# file: teamfolder
# owner: teamuser
# group: teamgroup
user::rwx
group::rwx
other::r-x
default:user:rwx
default:group:rwx
default:other:r-x
Granting and Revoking Access

Granting a user write access to the team folder is now extremely easy: you can just add that user from the team's group when he joins the team:

$ sudo usermod -a -G teamgroup joiner

Where joiner is the user ID of the user joining the team. Revoking access is nearly as easy, you just need to remove the user from the team's group. Unfortunately, there is no way to do this in a simple command so you will have to edit the file /etc/group, find the group and remove the user ID from that group.

Variations

Restrict Delete and Rename to Owner

By default, any user who has write access to a file can delete or rename it. This means that any member of the team can delete or rename any file created by another member. This is generally OK but if it is not, it can also be restricted by setting the sticky bit on the directory:

$ chmod +t teamfolder
$ ls -l
drwxrwsr-t 2 teamuser teamgroup 4096 2010-03-03 14:32

This feature is used on the /tmp directory to ensure that all files created in that directory can only be deleted by their owners.

Restrict Access for Others

Another variation that may be more useful is to completely deny access for users that are not part of the team. it may be that a particular team is working on some sensitive stuff and you don't want anybody outside the team to see it. To do this, we just revoke all permissions and ACLs for others on the team folder:

$ chmod o-rx teamfolder
$ setfacl -d -m o::--- teamfolder

References

Saturday, 17 April 2010

Ubuntu Lucid Netbook Remix from Alternate CD

The Problem

I've had Ubuntu Netbook Remix running on my Asus EeePC 701 for some time. After upgrading my main laptop to the beta 2 of Ubuntu Lucid 10.04, I wanted to do the same to the EeePC so that I could test the new release, report bugs if I found any and generally benefit from the improvements in 10.04.

The first problem I faced was that the EeePC 701 I have only has 4GB of internal storage, which is just enough for Ubuntu but too little to enable me to do a straight upgrade from the previous version (Karmic 9.10). No problem, I thought, I can re-install from scratch as I really have nothing important on that machine.

I created a flash drive image from the UNR CD, as detailed on the Ubuntu web site, booted my EeePC from it and selected to install Ubuntu on the system. However, I then faced another problem related to the limitations of the 701 model: this model has a 7-inch screen with a resolution of 800x480 pixels, which is quite small and the Prepare Disk Space screen doesn't fit in that resolution, making it impossible to install. I duly reported the bug and wondered how I could work around that problem.

Installing from the Alternate CD

One of the great thing with Linux is that you always have a lot of options. Ubuntu in particular also comes with an alternate installer, which is text based and designed to work on very constrained hardware. Exactly what I needed!

I downloaded the alternate CD, created a flash drive image from it, booted the EeePC from it and started installing Ubuntu. The installation from the alternate CD is extremely easy and follows exactly the same path as with the standard CD, with the difference that you don't have the flashy graphical user interface. At the end of the installation, I had a perfectly functional Ubuntu system using the standard desktop. However, what I wanted was the netbook desktop.

From Standard to Netbook Desktop

The Ubuntu netbook desktop looks very different from the standard one but in practice it is just made up of a small number of packages.

Adding the Netbook Packages

Adding the netbook packages is extremely easy. Open a terminal and run the following command:

$ sudo apt-get install go-home-applet maximus\
 netbook-launcher window-picker-applet
Adding Launcher and Maximus to Application Startup

Once this is done, you will need to ensure the netbook launcher and maximus applications are started automatically. To do this, go to System -> Startup Applications and add two entries with the following commands:

  • netbook-launcher
  • maximus

Make sure that both can be started by starting them manually, either in a terminal window or via ALT-F2. Then, disable the desktop to ensure you don't accidentally click on it when you want to start an application:

$ sudo gconftool-2 --type bool\
 --set /apps/nautilus/preferences/show_desktop false
Customising the Gnome Panels

You then need to customise the Gnome panels.

Right click on the top panel, where the Applications menu is and remove it. Do the same with the Firefox and Help icons. Then right-click again, in an empty area, and select "Add to Panel"; add the Go Home Applet, which will add a small Ubuntu icon. Right click on that icon again, select "Move" and move it all the way to the left.

Right click on an empty area of the top panel and select "Add to Panel"; add the Window Picker Applet and move it to the left so that it is flush left against to Go Home Applet.

Finally, right-click on the bottom panel and select "Delete this Panel".

Log out, log back in again and you should have a full netbook desktop that look something like this:

Lucid Netbook Desktop

Lucid Netbook Desktop

At first, the favourites folder will be empty so you will have to add them yourself.

Final Changes

One final change I made to the installation is that I removed OpenOffice.org and Evolution. The former because it occupies a lot of hard disk space, the latter because it really doesn't work well on so small a screen.

Other Options

An alternative option to install all the required packages is to install the netbook meta-package:

$ sudo apt-get install ubuntu-netbook

I didn't try this so I don't know how much it installs and configures for you. One of the nice side effect of doing it the way I did is that it keeps some standard configuration, such as the multiple workspaces that you can access via CTRL+ALT+arrow keys. I find that this works particularly well with the netbook interface.

Wednesday, 17 March 2010

SVG and HTML5 Support in IE9

The Register has an article today about the next version of Microsoft Internet Explorer, IE9. You can already download a preview and apparently it looks nice and has support for SVG and HTML5. At last! I hear you say, only 2 years after the rest of the pack. The reason why I find this very exciting is because of SVG rather than HTML5. This is the type of technology that could be very useful in all sorts of areas where Flash is used today, as demonstrated by Microsoft's business charts and map examples.

So what can you do with SVG that you can't do with Flash? In a nutshell, here is my short list:

  • You can style SVG using CSS, the same as HTML so if you want to change the look and feel of your site, you can do text and graphics in one go;
  • It is a W3C standard so anybody can provide an implementation and you are not tied to a particular company;
  • It is a dialect of XML so anybody with a text editor can create SVG data;
  • As a dialect of XML, every tool that manipulates XML and HTML, including web based languages like PHP can manipulate SVG so it is extremely easy to generate on the fly and integrate into a web page;
  • You can use AJAX technologies with it the same way you do with HTML.

I'm sure there are others but that's all I can think of at 1:30am. Generally speaking, the huge advantage of SVG is that it can re-use the complete HTML tool chain, which offers a huge variety of tools both open source and commercial.

Tuesday, 16 March 2010

Fractals with Octave: The Whole Shebang

After all this time writing this simple series of how to create fractals with Octave, I finally got to the end of it and published the code on GitHub so here is a nifty summary.

Articles

Each article has a link to the previous and following ones so you can just start with the first one and follow up to the last one.

Code

The code is available on GitHub and can be downloaded from the project page, where you will also find some installation instructions.

If you're interested, please download the code and if you use it to create stunning images, I'd love to hear from you. If you think you can improve the code, don't hesitate to suggest changes or fork it.

References

To quote the project page, none of this was created in a vaccum. I used a number of offline and online references so if you are interested in the subject of fractals, you could do a lot worse than checking them out:

Thursday, 4 March 2010

The Art of Database Analysis, Take 2

Thanks to Ed, I found this interesting post on graphs and decided to adapt it to my previous database graph. So I now have a version of that script that uses the pygraph library:

Database PyGraph

Database Graph

I like this one better, it looks a lot more organic.

Saturday, 27 February 2010

Fractals with Octave: Original Function Studied by Gaston Julia

The story so far

After another long pause, here is the sixth instalment of this series on fractals with Octave. In this article, we have a look at the complex series that started is all, the one that Gaston Julia was interested in.

Once Upon A Time: The Original Fractal Function

The classic Mandelbrot set we all know and love is derived from quite a simple series, described in the very first article of this series. Gaston Julia was interested in a slightly more complex series, as explained by Paul Bourke:

zn+1=z4 + z3/(z-1) + z2/(z3+4z2+5) + c

The initial condition is:

z0=0

The Mandelbrot Set

We can produce a Mandelbrot set of that equation with the mandelbrot function that we created in previous articles.

octave:1> Mj=mandelbrot(-1.4+1.05i,1.4-1.05i,320,64,
> @(z,c) z.^4.+z.^3./(z-1)+z.^2./(z.^3.+4*z.^2.+5).+c;
octave:2> imagesc(Mj)

And here is the result:

Original Julia Series, Mandelbrot Set

We can then zoom on the bottom right corner of that image.

octave:1> Mjz=mandelbrot(0.25-0.65i,0.45-0.8i,320,64,
> @(z,c) z.^4.+z.^3./(z-1)+z.^2./(z.^3.+4*z.^2.+5).+c;
octave:2> imagesc(Mjz)

Original Julia Series, Mandelbrot Set x10

And again.

octave:1> Mjzz=mandelbrot(0.378-0.725i,0.398-0.74i,320,64,
> @(z,c) z.^4.+z.^3./(z-1)+z.^2./(z.^3.+4*z.^2.+5).+c;
octave:2> imagesc(Mjzz)

Original Julia Series, Mandelbrot Set x100

And again!

octave:1> Mjzzz=mandelbrot(0.3863-0.7314i,0.3883-0.7329i,320,64,
> @(z,c) z.^4.+z.^3./(z-1)+z.^2./(z.^3.+4*z.^2.+5).+c;
octave:2> imagesc(Mjzzz)

Original Julia Series, Mandelbrot Set x1000

The Julia Set

Now, let's have a look at the Julia set for the same series and for c=0.3873-0.7314i, which is the point towards which we zoomed on in the Mandelbrot set.

octave:1> Jj=julia(-1.2+1.6i,1.2-1.6i,240,64,0.3873-0.7314i,
> @(z,c) z.^4.+z.^3./(z-1)+z.^2./(z.^3.+4*z.^2.+5).+c;
octave:2> imagesc(Jj)

Original Julia Set, c=0.3873-0.7314i

Let's zoom into that picture.

octave:1> Jjz=julia(0.2+0.1i,0.4-0.05i,320,64,0.3873-0.7314i,
> @(z,c) z.^4.+z.^3./(z-1)+z.^2./(z.^3.+4*z.^2.+5).+c;
octave:2> imagesc(Jjz)

Original Julia Set, c=0.3873-0.7314i, x10

And again.

octave:1> Jjzz=julia(0.366+0.09i,0.386+0.075i,320,64,0.3873-0.7314i,
> @(z,c) z.^4.+z.^3./(z-1)+z.^2./(z.^3.+4*z.^2.+5).+c;
octave:2> imagesc(Jjzz)

Original Julia Set, c=0.3873-0.7314i, x100

And again!

octave:1> Jjzzz=julia(0.366+0.09i,0.386+0.075i,320,64,0.3873-0.7314i,
> @(z,c) z.^4.+z.^3./(z-1)+z.^2./(z.^3.+4*z.^2.+5).+c;
octave:2> imagesc(Jjzzz)

Original Julia Set, c=0.3873-0.7314i, x1000

The End

This is the last article in this series. I hope you've enjoyed it, even if it took me a very long time to finish it. Have a play with the Octave functions described throughout the articles, modify them, improve them, there's a lot of fun stuff to do and amazing pictures to create with fractals.

Wednesday, 24 February 2010

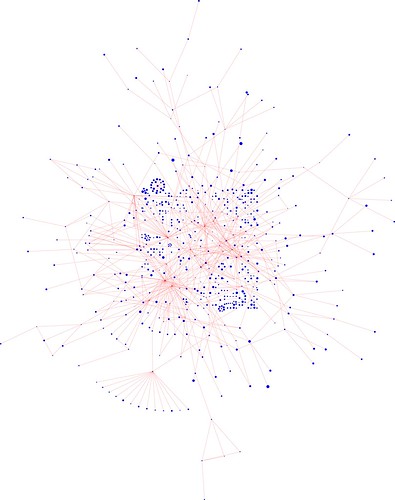
The Art of Database Analysis

Take a complex database schema, apply a bit of python to produce an SVG graph and you can come up with weird and wonderful pictures:

Database Bullseye

Database Bullseye

If anybody is interested in the python code I used to create that graph, please ask. The more complicated and convoluted the database, the better the picture.

Friday, 5 February 2010

Raising elephants on a ThinkPad T42 and an EeePC 701

A magic key

If you look at your computer keyboard, you probably have a key labelled SysRq somewhere, either on its own or as a secondary function of another key such as PrtSc. You probably never use it but if you run Linux, it's a magic key that enables you to perform low level commands even when the computer is completely stuck. A particularly useful combination of such commands uses the mnemonic Raising Elephants Is So Utterly Boring.

Finding SysRq

That's the theory. In practice, it can be difficult to find out what exact key combination triggers SysRq on your particular computer and whether you need to press SysRq and the command key at the same time or whether you can press SysRq first, release and then press the command key. To find out, switch to a text virtual terminal, by pressing Ctrl+Alt+F1. You will then be presented with a full screen black console with a login prompt. Don't worry, you can switch back to your normal screen by pressing Ctrl+Alt+F7 at any time. Log in with your user name and password. For this to work, we first need to check that support for SysRq is compiled in your kernel. To do this, enter the following command:

$ cat /boot/config-`uname -r` | grep CONFIG_MAGIC_SYSRQ
CONFIG_MAGIC_SYSRQ=y

If the result is as shown above, SysRq is compiled in your kernel. Next, we need to make sure it's enabled:

$ cat /proc/sys/kernel/sysrq
1

If it is enabled, you should get 1 as an answer. If you get 0, it's not enabled, if you get anything else, it's partially enabled. The full list of values can be found in the sysrq.c documentation. If it all enabled, it should be possible to try it out by sending a command directly to the SysRq trigger:

$ sudo su -
$ echo h > /proc/sysrq-trigger

You need to be root to do this, hence the sudo su - to start with. When you do this, you should see the SysRq held text printed out to the console. After that, revert to your own user immediately to avoid any risk of doing something bad to your computer: root is very powerful and it's therefore very easy to do something bad by accident. So type this command to revert to your own user:

$ exit

Now it's a case of trying all possible key combination with the h command to find out what your SysRq key is. If you have a full SysRq key, typing Alt+SysRq+h should display the same help message as above. If that's the case, you're done. Otherwise try any number of combinations of the keys Shift, Ctrl, Alt, AltGr or Fn with one of the keys SysRq, PrtSc, Insert, Delete, ScrLk and key h until you find what combination produces the help message. Once you've found it, log out by typing exit and revert to your standard virtual terminal by pressing Ctrl+Alt+F7

SysRq on a ThinkPad T42 and an EeePC 701

On my IBM ThinkPad T42, the SysRq key combination is AltGr+PrtSc so to get the help text, I would do AltGr+PrtSc+h. On my EeePC 701, the combination is Fn+Alt+Del, which means I have to press four keys at the same time to get the SysRq help text: Fn+Alt+Del+h! Luckily it's a small keyboard. On both machines, I have to press all 3 or 4 keys at the same time.

Tuesday, 19 January 2010

Improving your Linux Skills

I came across a few interesting web sites that are excellent resources if you want to improve your Linux skills: