Showing posts with label development. Show all posts

Sunday, 30 January 2011

D-Bus Experiments in Vala

Most modern Linux desktop distributions now include D-Bus. It enables different applications in the same user session to communicate with each other or with system services. So I thought I'd experiment with D-Bus using Vala and starting with the published example.

Example 1: Ping Loop

I started with a simple ping client and server based on the example above, the main difference being that I added a loop in the client. The server code takes a message and an integer, prints out the message and the received integer, then adds one to the integer before returning the result:

[DBus (name = "org.example.Demo")]
public class DemoServer : Object {

    public int ping (string msg, int i) {
        stdout.printf ("%s [%d]\n", msg, i);
        return i+1;
    }
}

void on_bus_aquired (DBusConnection conn) {
    try {
        conn.register_object ("/org/example/demo",
            new DemoServer ());
    } catch (IOError e) {
        stderr.printf ("Could not register service\n");
    }
}

void main () {
    Bus.own_name (
        BusType.SESSION, "org.example.Demo",
        BusNameOwnerFlags.NONE,
        on_bus_aquired,
        () => {},
        () => stderr.printf ("Could not aquire name\n"));

    new MainLoop ().run ();
}

server.vala

And the client simply queries the server in a loop every second and prints out the input and output values:

[DBus (name = "org.example.Demo")]
interface DemoClient : Object {
    public abstract int ping (string msg, int i)
        throws IOError;
}

void main () {
    int i = 1;
    int j;
    while(true) {
        try {
            DemoClient client = Bus.get_proxy_sync (
                BusType.SESSION, "org.example.Demo",
                "/org/example/demo");

            j = client.ping ("ping", i);
            stdout.printf ("%d => %d\n", i, j);
            i = j;

        } catch (IOError e) {
            stderr.printf ("%s\n", e.message);
        }
        Thread.usleep(1000000);
    }
}

client.vala

Compiling both programs requires the gio-2.0 package:

$ valac --pkg gio-2.0 server.vala
$ valac --pkg gio-2.0 client.vala

Start the server followed by the client in two separate terminal windows and you should see them exchange data.

Example 2: Graceful Termination

The problem with the code above is that if the server process terminates while the client is still running, an exception occurs and the client doesn't recover. It would be nice if we could get the client to terminate gracefully when the server stops. The Vala GDBus library provides the ability to detect when a service comes up or is brought down using watches. When you setup a watch, you need a callback method for the watch to call. That callback method needs to be called on a different thread than the main client thread. This is handled by the MainLoop class but it means that the core client loop needs to be run in its own thread, which complicates the client code a bit. In the code below, the client code has been encapsulated into a Demo class and the client loop thread is controlled using a simple boolean attribute.

[DBus (name = "org.example.Demo")]
interface DemoClient : Object {
    public abstract int ping (string msg, int i)
        throws IOError;
}

public class Demo : Object {
    private bool server_up = true;
    
    private DemoClient client;
    
    private uint watch;
    
    private MainLoop main_loop;
    
    public Demo() {
        try {
            watch = Bus.watch_name(
                BusType.SESSION,
                "org.example.Demo",
                BusNameWatcherFlags.AUTO_START,
                () => {},
                on_name_vanished
            );
            client = Bus.get_proxy_sync (
                BusType.SESSION,
                "org.example.Demo",
                "/org/example/demo");
            server_up = true;
        } catch (IOError e) {
            stderr.printf ("%s\n", e.message);
            server_up = false;
        }
    }
    
    public void start() {
        main_loop = new MainLoop();
        Thread.create(() => {
            run();
            return null;
        }, false);
        main_loop.run();
    }
    
    public void run() {
        int i = 1;
        int j;
        while(server_up) {
            try {
                j = client.ping ("ping", i);
                stdout.printf ("%d => %d\n", i, j);
                i = j;
            } catch (IOError e) {
                stderr.printf ("%s\n", e.message);
            }
            if (server_up)
                Thread.usleep(1000000);
        }
        main_loop.quit();
    }
    
    void on_name_vanished(DBusConnection conn, string name) {
        stdout.printf ("%s vanished, closing down.\n", name);
        server_up = false;
    }
}

void main () {
    Demo demo = new Demo();
    demo.start();
}

client.vala

The server code is unchanged.

With this version, once the server and client are started, stopping the server through CTRL-C will notify the client which will then stop gracefully. You can even have multiple clients, they will all stop in the same way. The advantage of doing this is that the client has a chance to clean up any resource it holds before stopping.

Example 3: Peers and Service Migration

All of the above is great and we can now design client programs that share a common service. But when dealing with software that is started by the user, the client/server model is not always the best option: you need to ensure that the server is started before any client is and that it is only stopped after the last client has stopped. And what happens is the server fails? What would be really nice is if we could have peers: no difference between client and server, just a single executable that can be run multiple times, the first process to start acts as a server for the other ones and when it stops responsibility for the service is taken over by one of the other processes if any are still running. The last process to terminate closes the service. D-Bus makes it easy to implement for the following reasons:

  • Only one process can own a service;
  • All service calls go via D-Bus so a client process will not notice if the server process actually changes, as long as the service is still available;
  • The client and server processes can be the same process or different processes, it makes no difference to the client.

Therefore, the implementation of the peer program is simple:

  • Start the server, followed by the client and ignore any failure in starting the server: if another process has already started, the service will be available to the client;
  • When the peer is notified of the loss of service, try to start the server but ignore any failure: if another process was notified first, it will have started the server and there will be no interruption in service for the client thread.

We only need a single Vala file to implement the peer:

[DBus (name = "org.example.Demo")]
interface DemoClient : Object {
    public abstract int ping (string msg, int i)
        throws IOError;
}

[DBus (name = "org.example.Demo")]
public class DemoServer : Object {

    public int ping (string msg, int i) {
        stdout.printf ("%s [%d]\n", msg, i);
        return i+1;
    }
}

public class Demo : Object {
    private DemoClient client;
    
    private uint watch;
    
    public Demo() {
        // nothing to initialise
    }
    
    public void start() {
        start_server();
        start_client();
        new MainLoop().run();
    }
    
    public void start_client() {
        try {
            watch = Bus.watch_name(
                BusType.SESSION,
                "org.example.Demo",
                BusNameWatcherFlags.AUTO_START,
                on_name_appeared,
                on_name_vanished
            );
            client = Bus.get_proxy_sync (
                BusType.SESSION,
                "org.example.Demo",
                "/org/example/demo");
            Thread.create(() => {
                run_client();
                return null;
            }, false);
        } catch (IOError e) {
            stderr.printf ("Could not create proxy\n");
        }
    }
    
    public void run_client() {
        int i = 1;
        int j;
        while(true) {
            try {
                j = client.ping ("ping", i);
                stdout.printf ("%d => %d\n", i, j);
                i = j;
            } catch (IOError e) {
                stderr.printf ("Could not send message\n");
            }
            Thread.usleep(1000000);
        }
    }
    
    public void start_server() {
        Bus.own_name (
            BusType.SESSION,
            "org.example.Demo",
            BusNameOwnerFlags.NONE,
            on_bus_aquired,
            () => stderr.printf ("Name aquired\n"),
            () => stderr.printf ("Could not aquire name\n"));
    }
    
    void on_name_appeared(DBusConnection conn, string name) {
        stdout.printf ("%s appeared.\n", name);
    }
    
    void on_name_vanished(DBusConnection conn, string name) {
        stdout.printf (
            "%s vanished, attempting to start server.\n",
            name);
        start_server();
    }

    void on_bus_aquired (DBusConnection conn) {
        try {
            conn.register_object (
                "/org/example/demo",
                new DemoServer ());
        } catch (IOError e) {
            stderr.printf ("Could not register service\n");
        }
    }
}

void main () {
    Demo demo = new Demo();
    demo.start();
}

peer.vala

Start several peers in different terminal windows, at least 3 or 4. You will notice that the first process starts a server thread that all client threads connect to. When the process that provides the service terminates, the next process in the chain takes over the responsibility for the service. And finally, when the last process terminates, the service is closed.

Note that if you want to check D-Bus activity while running the programs in this introduction, you can either install the D-Feet tool or run dbus-monitor from the command line.

Sunday, 15 August 2010

Contributing to Shotwell

Background

I use open source software every day on all the computers I own. In fact, outside of work environments where Windows is still predominant, very little of the software I use is closed source these days. As a result, I've wanted to contribute back to the community that has developed such great software by fixing bugs and implementing new features. However, I've found it a lot more difficult that I expected. To make any meaningful contribution, the project I would contribute back to had to be a piece of software that I used regularly. When I look at the ecosystem of software I use regularly, they are either written in C, a language that I haven't programmed in for 20 years (assuming the stuff I did at university actually counts) or they are extremely complex, or both.

Then, a few months ago, I got wind that one of the planned changes for Ubuntu 10.10 (Maverick Meerkat) was to replace the default photo management software: F-Spot was out, Shotwell was in. Photo management has been a sore spot of mine for ages on Ubuntu. None of the software that was available until now actually met my needs so I ended up not using any photo management software and doing everything through the file manager. Looking into it, it looked like Shotwell was the ideal opportunity for me to get a photo manager I liked. Shotwell uses Vala as a programming language, which I found intriguing and which I thought should be easier than C to get into.

Baby Steps

So I downloaded the source from the SVN repository, built the software and lo and behold, the build was actually easy and 10 minutes later I had a local version of Shotwell to play with. I then had a look at the source code and found it very easy to understand. So I thought: let's see if I can fix an easy bug!

For that experiment, I choose a bug that looked extremely easy: bug 1954 looked like the ideal candidate because it merely consisted in adding a line of information to an existing window in exactly the same way as the other lines already present in the window. And indeed, the fix was trivial. So I created a patch and uploaded it to the bug tracker.

What happened next was very important and is something that all community projects should be very attentive to: I got some feedback on my patch within a day, basically saying that the patch had now been committed to trunk with a minor modification. This is extremely important and is something the Yorba team, who produce Shotwell are very good at doing: all contributors are welcome and any contribution, such as suggestions or patches, are acknowledged very quickly. From a contributor's point of view, it means that you know that you can really participate and help the core development team improve their software.

More Complex Bugs

Quite chuffed by the outcome of my first bug fix, I decided to use Shotwell extensively and try solving more complex bugs. I eventually hit a significant issue with my SLR camera, which I duly reported in the bug tracker and which I decided to attempt to solve. It took a bit of time but I eventually got there and as a side effect actually solved another bug: result!

A Whole New Feature

By now completely sold on Shotwell, I wanted to do my bit so that it would be well received by Ubuntu users. In my mind, the most important thing was to ensure a smooth transition from F-Spot to Shotwell and indeed the migration was one of the major requested features in Launchpad and very high on the Yorba list too.

Implementing such a major feature can feel a bit daunting at first but, at the end of the day, integrating and migrating from weird and wonderful databases is something I get involved in on a regular basis in my day job so bringing that experience to Shotwell sounded like the way to go. And to be honest, the F-Spot database is extremely simple compared to some of the horrors I've faced recently.

It took a bit of time and I learnt a lot about Vala and the GObject library in the process. Thanks to the support from Jim and Adam from Yorba I got there in the end and finished the bulk of it in the middle of GUADEC. A few more extra tweaks were required but it's now in fairly good shape, ready to face the hordes of new users that Ubuntu will bring it.

There you go, that was my first major contribution to an open source project and I'm now hooked so will endeavour to contribute more.

Wednesday, 17 March 2010

SVG and HTML5 Support in IE9

The Register has an article today about the next version of Microsoft Internet Explorer, IE9. You can already download a preview and apparently it looks nice and has support for SVG and HTML5. At last! I hear you say, only 2 years after the rest of the pack. The reason why I find this very exciting is because of SVG rather than HTML5. This is the type of technology that could be very useful in all sorts of areas where Flash is used today, as demonstrated by Microsoft's business charts and map examples.

So what can you do with SVG that you can't do with Flash? In a nutshell, here is my short list:

  • You can style SVG using CSS, the same as HTML so if you want to change the look and feel of your site, you can do text and graphics in one go;
  • It is a W3C standard so anybody can provide an implementation and you are not tied to a particular company;
  • It is a dialect of XML so anybody with a text editor can create SVG data;
  • As a dialect of XML, every tool that manipulates XML and HTML, including web based languages like PHP can manipulate SVG so it is extremely easy to generate on the fly and integrate into a web page;
  • You can use AJAX technologies with it the same way you do with HTML.

I'm sure there are others but that's all I can think of at 1:30am. Generally speaking, the huge advantage of SVG is that it can re-use the complete HTML tool chain, which offers a huge variety of tools both open source and commercial.

Thursday, 4 March 2010

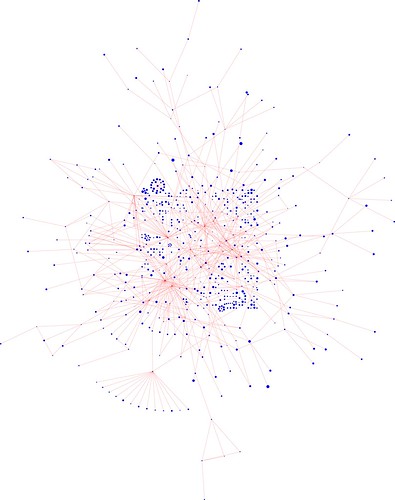
The Art of Database Analysis, Take 2

Thanks to Ed, I found this interesting post on graphs and decided to adapt it to my previous database graph. So I now have a version of that script that uses the pygraph library:

Database PyGraph

Database Graph

I like this one better, it looks a lot more organic.

Wednesday, 24 February 2010

The Art of Database Analysis

Take a complex database schema, apply a bit of python to produce an SVG graph and you can come up with weird and wonderful pictures:

Database Bullseye

Database Bullseye

If anybody is interested in the python code I used to create that graph, please ask. The more complicated and convoluted the database, the better the picture.

Tuesday, 19 January 2010

Improving your Linux Skills

I came across a few interesting web sites that are excellent resources if you want to improve your Linux skills:

Saturday, 14 February 2009

Designing Good Error Handling

Usability is an important subject in software design. Your application can be the coolest thing since sliced bread, if it's difficult to use, people will just not bother. We all know that. There are lots of books and articles on usability. However, such material often forgets about one important aspect of usability: error handling and messages. When your application encounters an error, whether it is due to something the user did or to a bug, it is extremely important to ensure it behaves in a way that makes sense to the user, even more important than for normal behaviour. This is because when an error occurs, your user will typically be stopped in his tracks and asked to resolve a problem he wasn't expecting to be faced with. If the error handling adds to the confusion rather than help, the user will not know what to do and his confidence about the application and his own ability to understand it will significantly diminish. So here are a couple of example of what not to do, helpfully provided over the past week by applications I use at work.

Cryptic error message

We use Borland StarTeam at work to manage change and configuration. When starting the application earlier this week, I was faced with the following error message:

Borland StarTeam error message consisting of a single zero

Yes, the error message consists of a single zero. Difficult to do any shorter or any more cryptic. At that point, I am given two options: a Details button and an OK one. Assuming the Details button may lead me to a more understable explanation, I clicked it and it showed me the following message:

Borland StarTeam detailed error message showing a Java exception

This is absolutely meaningless for anybody who is not a Java developer. And even for those who are, it doesn't really help, it only shows that there is a bug in the product where an internal array is not checked for size before accessing its first entry. It doesn't tell me whether the application will keep working or whether it will horribly crash when I click OK. It so happens that clicking OK made the message box disappear and the application kept working normally after that.

So, how can we improve on such a message? The best way in my opinion would be to display a message to the user explaining that an internal problem has occurred in the application and how they can report it to Borland. What is displayed in the details screen would be invaluable to the developers in order to correct the bug. So directions on how to send that information to the product team would make the user feel that the company cares about the qulity of their product and that they are ready to receive bug reports. Not all users would actually go through the steps of reporting the bug but some would.

Lack of information

Another error I was faced with this week came from the automated backup tool. This tool, which is installed on all laptops will continually backup changes in the user's folder to a central server. It runs in the background, is relatively unobtrusive and flexible enough that you can select sub-directories that you don't want to have backed up. However, it sometimes require your attention and will pop up a message. I was faced with this one yesterday:

Error message saying: Part-complete actions have been found due to an interruption during last sync. Click OK to complete there actions before scanning. Click Cancel to continue with the scan and ignore the part-completed actions

Contrary to the previous example, this message is in plain English and I can understand every word of it. However, it is worded in such a generic way that I have no idea whether I should click OK or Cancel. I don't know what part-completed actions it refers to and therefore don't know whether those actions should be completed or not. I suspect that they should because the default button is the OK one but I can't be sure. Also note that the word scan is misleading: it only makes sense to me because I have a fair idea of how the backup tool works but it could make the user think this is a message from the anti-virus system.

So, what could be done to make it more useful? First, the message should identify what application triggered it. It is important in this case because it is triggered by a background process and is completely unrelated to what the user was doing at the time. Then the obvious thing to do would be to detail what actions are pending and require attention. However, this may not be enough. If the actions' descriptions are too cryptic, that won't help the user make a decision. So the message should also ensure that the descriptions for the pending actions are clear and concise.

Conclusion

Usability is good but it should also go hand in hand with error handling. So next time you design a piece of software, make sure all the error messages that can potentially be displayed to the user are clear and include enough information, especially if the user is expected to take a decision based on the message. If the message is triggered by an unexpected error, consider giving the user a way to report the error so that you can correct the bug in a subsequent version.

Saturday, 26 July 2008

Parameterised Testing with JUnit 4

Anybody who's ever written software more complex than the typical Hello, World! examples knows that software without bugs doesn't exist and that it needs to be tested. Most people who have ever done testing on programs written in the Java language have come across JUnit. Now, JUnit is a very small package. In fact, when you look at the number of classes provided you'd think it doesn't do anything useful. But don't be fooled, in this small amount of code lies extreme power and flexibility. Even more so since JUnit 4 that makes full use of the power of annotations, introduced in Java 5.0.

Typically, when using JUnit 3, you'd create one test case class per class you want to test and one test method per method you want to test. The problem is, as soon as your method takes a parameter, it is likely that you will want to test your method with a variety of values for this parameter: normal and invalid values as well as border conditions. In the old days, you had two ways to do it:

  • Test the same method with several different parameters in a single test: it works but all your tests with different values are bundled into a single test when it comes to output. And if you have 100 error conditions and it fails on the second one, you don't know whether any of the remaining 98 work.
  • Create one method per parameter variation you want to try: you can then report each test condition individually but it can be difficult to tell when they are related to the same method. And it requires a stupid amount of extra code.

There must be a better way to do this. And JUnit 4 has the answer: parameterised tests. So how does it work? Let's take a real life example. I've been playing with the new script package in Java 6.0 to create a basic Forth language interpreter in Java. So far, I can do the four basic arithmetic operations and print stuff off the stack. That sort of code is the ideal candidate for parameterised testing as I'd want to test my eval method with a number of different scripts without having to write one single method for each test script. So, the JUnit test class I started from looked something like this:

<some more imports go here...>

import static org.junit.Assert.*;
import org.junit.Test;

public class JForthScriptEngineTest {

 @Before
 public void setUp() throws Exception {
  jforthEngineFactory = new JForthScriptEngineFactory();
  jforthEngine = jforthEngineFactory.getScriptEngine();
 }

 @After
 public void tearDown() throws Exception {
  jforthEngine = null;
  jforthEngineFactory = null;
 }

 @Test
 public void testEvalReaderScriptContext() throws ScriptException {
  // context
  String script = "2 3 + .";
  String expectedResult = "5 ";
  ScriptContext context = new SimpleScriptContext();
  StringWriter out = new StringWriter();
  context.setWriter(out);
  // script
  StringReader in = new StringReader(script);
  Object r = jforthEngine.eval(in, context);
  assertEquals("Unexpected script output", expectedResult,
   out.toString());
 }

 @Test
 public void testGetFactory() {
  ScriptEngine engine = new JForthScriptEngine();
  ScriptEngineFactory factory = engine.getFactory();
  assertEquals(JForthScriptEngineFactory.class, factory.getClass());
 }

 private ScriptEngine jforthEngine;
 
 private ScriptEngineFactory jforthEngineFactory;
}

My testEvalReaderScriptContext method was exactly the sort of things that should be parameterised. The solution was to extract that method from this test class and create a new parameterised test class:

<some more imports go here...>

import org.junit.runner.RunWith;
import org.junit.runners.Parameterized;
import org.junit.runners.Parameterized.Parameters;

@RunWith(Parameterized.class)
public class ParameterizedJForthScriptEngineTest {
 @Parameters
 public static Collection<String[]> data() {
  return Arrays.asList(new String[][] {
    { "2 3 + .", "5 " },
    { "2 3 * .", "6 " }
  }
  );
 }
 
 public ParameterizedJForthScriptEngineTest(
   String script, String expectedResult) {
  this.script = script;
  this.expectedResult = expectedResult;
 }

 @Before
 public void setUp() throws Exception {
  jforthEngineFactory = new JForthScriptEngineFactory();
  jforthEngine = jforthEngineFactory.getScriptEngine();
 }

 @After
 public void tearDown() throws Exception {
  jforthEngine = null;
  jforthEngineFactory = null;
 }

 @Test
 public void testEvalReaderScriptContext() throws ScriptException {
  // context
  ScriptContext context = new SimpleScriptContext();
  StringWriter out = new StringWriter();
  context.setWriter(out);
  // script
  StringReader in = new StringReader(script);
  Object r = jforthEngine.eval(in, context);
  assertEquals("Unexpected script output", expectedResult,
   out.toString());
 }

 private String script;
 
 private String expectedResult;

 private ScriptEngine jforthEngine;
 
 private ScriptEngineFactory jforthEngineFactory;
}

The annotation before the class declaration tells it to run with a custom runner, in this case, the Parameterized one. Then the @Parameters annotation tells the runner what method will return a collection of parameters that can then be passed to the constructor in sequence. In my case, each entry in the collection is an array with two String values which is what the constructor takes. If I want to add more test conditions, I can just add more values in that collection. Of course, you could also write the data() method so that it reads from a set of files rather than hard code the test conditions and then you will reach testing nirvana: complete separation between tested code, testing code and test data!

So there you have it again: size doesn't matter, it's what you put in your code that does. JUnit is a very small package that packs enormous power. Use it early, use it often. It even makes testing fun! Did I just say that?

Update

I added the ability to produce compiled scripts in my Forth engine today, in addition to straight evaluation. I added a new test method in ParameterizedJForthScriptEngineTest and all parameterised tests are now run through both methods without having to do anything. What's better, I can immediately see what test data work in one case but not the other.

Wednesday, 5 March 2008

Leap Years and Microsoft

Following Leap Day last Friday and the confusion this seemed to generate, it looks like the problem is even worse that originally thought, especially where Microsoft products are concerned. And reading the comments on that Register article, it looks like they are not the only ones.

Via The Register.

Friday, 29 February 2008

Leap Year Maths

Today is Leap Day, the 29th of February. Reading this article on The Register earlier and in particular the comments, it looks like the logic behind calculating whether a year is a Leap Year is still fuzzy for some. This is an essential calculation to get right in any software that deals with dates (that is, most of them), so here are all the gory details.

Saturday, 26 January 2008

Playing with KML

The Idea

When I came back from holidays, I thought about creating a map of the journey in a way that I could share with friends. So I decided to try to do that using KML, the description language used by Google Earth. Google has tutorials and reference documentation about KML that got me started. In practice, what I wanted to do was very simple: lines showing the route and location pins showing the places I had visited on the way.

Document Structure

KML is a fairly straightforward XML dialect and the basic structure is very simple:

<?xml version="1.0" encoding="UTF-8"?>
<kml xmlns="http://earth.google.com/kml/2.2">
  <Document>
    Content goes here
  </Document>
</kml>

Route

For the route, I wanted lines that would roughly follow the route I had taken. To do this in KML is simple: add a Placemark tag containing a LineString tag that itself contains the coordinates of the different points on the line. So a simple straight line from London to Hamburg looks something like this:

<Placemark>
  <name>Outward flight</name>
  <LineString>
    <altitudeMode>clampToGround</altitudeMode>
    <coordinates> -0.1261270000000025,51.50896699999998
    9.994621999999991,53.55686600000001
    </coordinates>
  </LineString>
</Placemark>

The name tag is not essential but this is what will show in the side bar in Google Earth so it's better to have one. The clampToGround value in the altitudeMode tag tells Google Earth that each point on the line is on the ground so you don't have to specify the altitude in the coordinates. In the coordinates tag is a space separated list of coordinates. In this case, each point is specified by a longitude and a latitude separated by a comma, the altitude being implied. Longitude is specified with positive values East of the Greenwich meridian and negative values West of it. Latitude is specified with positive values North of the equator and negative values South of it.

That's good but another thing I wanted to do was specify different colours for the different types of transport I used during my holidays. KML has the ability to define styles that you can then apply to Placemark tags. This is done by adding a number of Style tags at the beginning of the document. You then have to specify the style using a styleUrl tag. Applying this to the simple line above, we get:

<Style id="planeJourney">
  <LineStyle>
    <color>ff00ff00</color>
    <width>4</width>
  </LineStyle>
</Style>


<Placemark>
  <name>Outward flight</name>
  <styleUrl>#planeJourney</styleUrl>
  <LineString>
    <altitudeMode>clampToGround</altitudeMode>
    <coordinates> -0.1261270000000025,51.50896699999998
    9.994621999999991,53.55686600000001
    </coordinates>
  </LineString>
</Placemark>

Note that the value for the color tag in the LineStyle is the concatenation of 4 hexadecimal bytes. The first byte is the Alpha value, that is how opaque is the colour, in our case the value ff specifies it is completely opaque. The next three bytes represent the Red, Green and Blue values, in our case a simple green.

Places

For places, I wanted a simple marker that showed more information when you clicked on it. This is also very simple in KML: a Placemark tag containing a name, a description and a Point tags. The name needs to be a simple string but the description can contain a full blown HTML snippet inside a CDATA node so you can include images, links and all sorts of things. Note that the box that will pop up when you select the place mark is quite small so don't overdo it. Here is an example for London:

<Placemark>
  <name>London</name>
  <description><![CDATA[<p><img src="some URL" /></p>
<p><a href="some URL">More photos...</a></p>]]></description>
  <Point>
    <coordinates>-0.1261270000000025,51.50896699999998,0</coordinates>
  </Point>
</Placemark>

Note that the coordinates here include the altitude as well as the longitude and latitude. You could also apply a style to the location place marks, in the same way as was done for the lines.

KML or KMZ

Once you've created your file, you need to save it with a .kml extension. You can then open it in Google Earth. When you're happy with it, you can also zip it and rename it with a .kmz extension: Google Earth will be able to load it as easily but the file will be smaller. Both files can also be used with Google Maps and can be shared online. So here is my complete holiday map built with KML.

Tips and Tricks

Getting the exact coordinates of a particular place can be cumbersome. To make it easy, just find the place in Google Earth, create a temporary place mark if there is none you can use, copy it with the Edit > Copy > Copy menu option and paste it in your text editor: you'll get the KML that defines the placemark, with exact coordinates.

The clampToGround option in the altitudeMode tag specifies that the points you define in the coordinates are at ground level. The line between two points will be straight, irrespective of what lays between said points. So if you have a mountain range in between, you will see your line disappear through the mountains. To correct this, you should insert intermediary points where the highest points are located. This is why on my map the flight between Izmir and Paris has intermediary points so that the line can go past the Alps without being broken.

If you want to do more complex stuff, be careful that Google Maps only supports a subset of KML. Of course, the whole shebang is supported by Google Earth.

Conclusion

KML is a nice and simple XML dialect to describe geographical data and share it online. It certainly beats writing postcards to show your friends and family where you've been and it doesn't get lost in the post.

Friday, 21 December 2007

Zend Framework on XAMPP

I am currently experimenting with the Zend Framework, using XAMPP on a Windows laptop and following Rob Allen's excellent tutorial. With a default installation of XAMPP, you get a nasty Error 500 whenever you test your system. This is because XAMPP doesn't enable the Apache mod_rewrite extension by default. So here's how to do it. Find the Apache configuration file, called httpd.conf, which on my install is in C:\xampp\apache\conf and uncomment the following line:

LoadModule rewrite_module modules/mod_rewrite.so

Restart XAMPP and it should all work.

Saturday, 27 October 2007

Geeky experiments with bash functions

return doesn't mean what you think it does

Modern UNIX shells like bash have the ability to define functions. Functions are a great way to factorise parts of code that you need to use in several areas of your script or isolate discrete pieces of logic. In most programming languages, one fundamental aspect of functions is that they can return a value which is the result of whatever computation they were doing. And indeed a shell like bash has a built in return command. But, hang on, if you read up on return, you realise that it can only return integer values. The reason for this is that return works the same way as exit: it sets the $? variable with the value given as argument, or 0 if no argument is given, and aborts the function. exit aborts the whole script instead. So, if you use return, use it to provide the calling code with an error code. This doesn't solve the original problem though: how can we return a value from a function, such as a character string?

As often with UNIX, the answer is deceptively simple and consistent with everything you know about scripts: just echo the value you want to return and call your function as if it was a full blown script, with inverted quotes or the $(...) construct, as in the example below.

#!/bin/bash

function f {
  echo "[ $1 ]"
  return 1
}

s=`f "abc"`
echo "\$?=$?"
echo "\$s=$s"

Save this in a file called fn.sh, make it executable and run it:

$ ./fn.sh
$?=1
$s=[ abc ]

As you can see, the $? special variable was set with the value 1 and the $s variable was updated with the result of the function.

Recursive fun

Once you know how to return a value from your function, the next thing you need is to know how to pass it some parameters. Once again, it works exactly the same as in a full blown script: you just use the $n positional variables. Recursion works as you expect as well. So let's demonstrate with a classic textbook example: a recursive factorial.

#!/bin/bash

function fact {
  if [ $# -lt 1 ]; then
    return 1
  elif [ $1 -lt 1 ]; then
    return 2
  elif [ $1 -eq 1 ]; then
    r=1
  else
    r=$(( $1 * `fact $(( $1 - 1 ))` ))
  fi
  echo "$r"
}

fact $1

Save it, run it and you should get something like the following. Don't give it too high a value though, we'll see why in a second: 10 should be enough to demonstrate that it works.

$ ./fact.sh 10
3628800

While we're here, let's have a quick look at this function as it has a couple of interesting constructs. It does the following:

  • check the number of parameters it has been passed, using the $# variable, and returns an error if less than 1,
  • check that the first parameter is positive, as a negative value is invalid and return an error code in this case,
  • check the termination condition of the recursion and set the result if we have reached that condition,
  • finally calculate the factorial by calling itself recursively.

Note the use of the $((...)) construct to do the relevant arithmetic calculations: one is needed inside the recursive call to the function, to tell ensure the value passed is the result if $1 - 1 rather than the three parameters $1, - and 1; another one is needed outside the call to calculate the product.

This script also proves that when using functions in this way, the variables defined inside the function are local and not overwritten by a subsequent call. This is because the use of the back quotes actually forks a new process in which the function is called. You can verify this by adding a sleep statement inside the function, running the script in the background and running ps:

$ ps
  PID  TT  STAT      TIME COMMAND
  394  p1  S      0:00.07 -bash
 2414  p1  S      0:00.01 /bin/bash ./fact.sh 10
 2415  p1  S      0:00.00 /bin/bash ./fact.sh 10
 2416  p1  S      0:00.00 /bin/bash ./fact.sh 10
 2417  p1  S      0:00.00 /bin/bash ./fact.sh 10
 2418  p1  S      0:00.00 /bin/bash ./fact.sh 10
 2419  p1  S      0:00.00 /bin/bash ./fact.sh 10
 2420  p1  S      0:00.00 /bin/bash ./fact.sh 10
 2421  p1  S      0:00.00 /bin/bash ./fact.sh 10
 2422  p1  S      0:00.00 /bin/bash ./fact.sh 10
 2423  p1  S      0:00.00 /bin/bash ./fact.sh 10
 2424  p1  S      0:00.00 sleep 5

Each child process has its own context and variables and doesn't interfere with the other ones. However, this means that you have to be extremely careful when using functions this way as you could quite easily spawn a large number of processes. Recursion in particular could be deadly.

Pipe dreams

Finally, if a function generally works like a script, can we pipe it? yes but if you want it to be on the consuming side of the pipe, you will need to adapt the function to take its input from stdin rather than a parameter. And you can even make it work so that it can do both. Here is a modified version of the very first script:

#!/bin/bash

function f {
  if [ $# -ge 1 ]; then
    echo "[ $1 ]"
  else
    while read line; do
      if [ -n "$line" ]; then
        echo `f "$line"`
      fi
    done
  fi
}

find ~ -type f -print | f

You could apply this construct to most functions: check if there are any parameters, in which case you can use them normally, otherwise read each input line and call the function recursively using the line as parameter. Don't forget to enclose it between quotes though, so that it is passed as a single parameter and blank lines don't trigger an infinite recursion. Run this script and you should get a list of all files in your home directory, with each file enclosed in square brackets.

That's it for functions. Please tell me if any of the examples above don't work for you. I have tested them on Ubuntu Linux, Sun Solaris Express and Mac OS-X so they should be fairly portable but you never know. They may not work with shells other than bash but feel free to experiment.

Monday, 11 June 2007

Broadband purgatory

Any experienced network administrator will tell you: the worse problems are not when nothing works but when it sort of works but not quite. So when I started having performance problems with my broadband connection 6 weeks ago, I knew I was in trouble. How to explain the problem to my ISP's helpdesk? I could download pages, even though they sometimes timed out but I couldn't upload any file. So my flickr photo stream started to dry out.

Of course, the first reaction of my ISP was to blame my equipment. As I had the same problem on a Power Mac G5 running OS-X and an IBM laptop running Windows XP, with Firefox as well as Internet Explorer, whether I was connected with to the network wirelesly or with a cable, it quickly came apparent that the only potential culprit on my side was the broadband router. As I was due for an upgrade anyway, I bought a new one and proved that I still had the problem with two different routers.

Then followed the various requests for test outputs to see what could go wrong. All this was a very slow process as I could not test during the day while my ISP's helpdesk was only able to review the tests during working hours. So a routine set in: I do a test during the evening, they look at it the following day, they suggest something else, I do a new test, etc. I quickly became frustrated and ended up writing a shell script to automate calls to traceroute followed by ping in order to get any decent statistics. And, lo and behold! It then became obvious that, anywhere on my network I had no packet loss whatsoever, whereas as soon as I reached my ISP's first router, I had between 5% and 50% packet loss depending on packet size. Now, 5% loss is huge and definitely way too high for TCP/IP to function properly. 50% loss doesn't even bear thinking about. The most likely culprit was now my broadband line. So my ISP passed the call to BT and, miracle, my connection now works like a charm! It only took 6 weeks to get there.

It's scary how we get used to facilities such as broadband though. Those 6 weeks really felt more like 6 months of frustration. Every time I clicked a link or a button on a page, I had no guarantee that it would load properly. Interestingly enough, the pages that were most affected by the problem were pages that depended on AJAX, GMail in particular. I suspect that this is because, when a normal page fails to load completely, the only downside is missing images and suchlike. The page is still usable. But an AJAX page can be completely crippled when it can't load everything: some essential functionality is missing. In fact, I saw exactly the same problem at work recently on my current project: a web application that depends heavily on Javascript and is completely broken if some of the Javascript source files fail to load properly. So, there's a moral for all AJAX developers out there: one of the rules to follow to build bulletproof AJAX is to ensure that your application still works, even if some of the code fails to load.

Following this, I just created a project on SourceForge, where I will maintain the script I developed during this incident. Obviously, this assumes the project gets approved by SourceForge. Assuming it does, I hope this tool proves useful to others and if anybody can contribute by testing it on other operating systems such as Linux or Solaris and helping me make it generic enough to run on those, it'd be much appreciated.

Friday, 8 December 2006

Zend Framework

For people who have been used to MVC frameworks such as Struts or Ruby on Rails, PHP can be very frustrating: a typical PHP page looks like tag soup that mixes business logic, presentation and database access. And there is no escaping PHP: this is the one technology that all ISP offer and a vast majority don't offer anything else. So up to know it was a case of setting up your own server to use your preferred technology or deal with tag soup.

So stumbling upon the Zend Framework today felt like a revelation! and what's even better, you can download an excellent tutorial from Rob Allen's weblog. The Zend Framework is still at an early stage of development but it looks extremely promising. If you use PHP, you have to try it out.